
Introduction
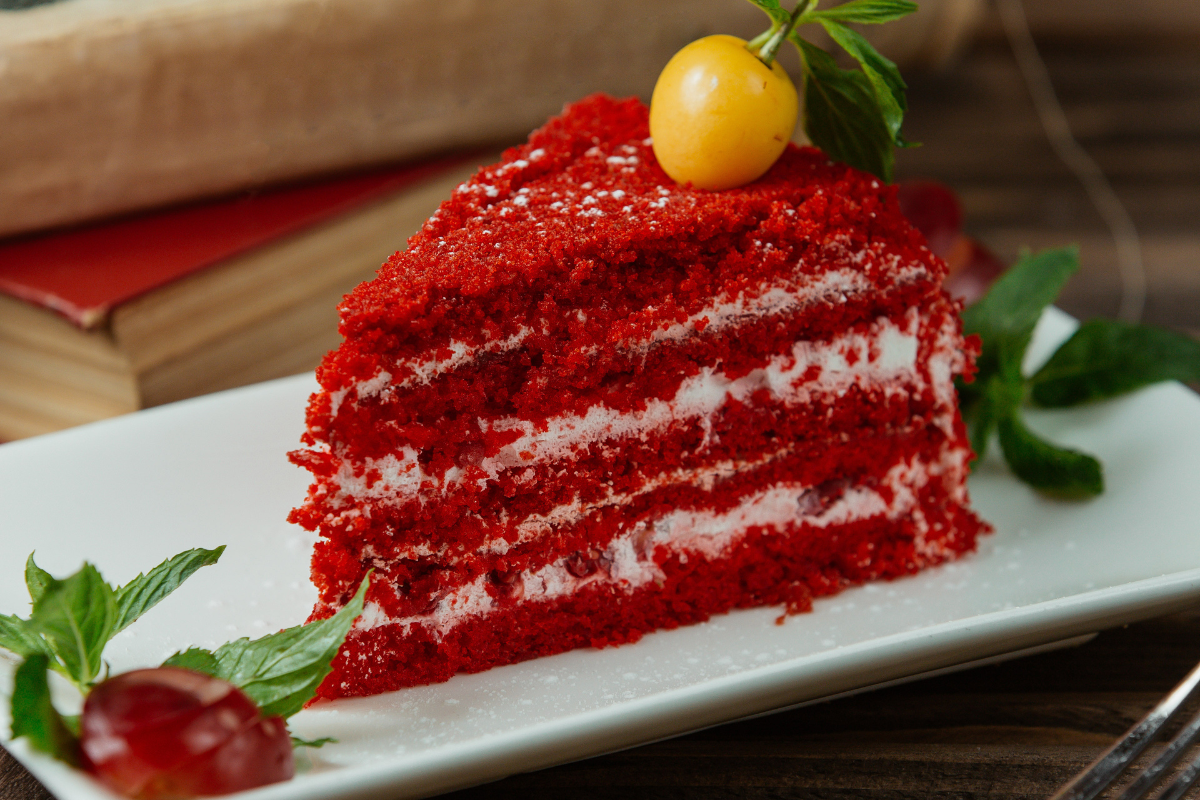
Welcome to the world of Red Velvet indulgence! Originating from a rich culinary history, Red Velvet Cake has secured its place as a timeless dessert that captures hearts with its velvety texture and vibrant crimson hue. In this comprehensive guide, we embark on a delightful journey to master the art of creating the perfect Red Velvet Cake in your own kitchen.
Unraveling the History
Red Velvet Cake’s roots trace back to the mid-20th century, with its popularity soaring in the Southern United States. Initially, the striking red color was achieved through a chemical reaction between cocoa and acidic ingredients. Today, food coloring provides the signature scarlet shade that adds an extra layer of charm.
Why Red Velvet?
Beyond its eye-catching appearance, Red Velvet Cake boasts a unique flavor profile—a subtle cocoa essence paired with a hint of tanginess from buttermilk, all harmoniously embraced by a creamy cream cheese frosting. It has become synonymous with celebrations, from birthdays to weddings, making it a must-have in any baker’s repertoire.
Join us as we demystify the secrets behind the Red Velvet magic, from the choice of ingredients to the finishing touches. Let’s dive into the world of Red Velvet Cake perfection!
Ingredients for the Perfect Red Velvet Cake
Crafting an impeccable Red Velvet Cake begins with selecting the finest ingredients. Each component plays a crucial role in achieving the distinct flavor and texture that makes this cake a beloved classic.
1. Cocoa Powder – The Heart of the Matter
Start with high-quality cocoa powder to infuse that subtle chocolate undertone. Choose a dutch-processed cocoa for a smoother, less acidic flavor that complements the tanginess of buttermilk.
2. Buttermilk – The Tangy Elixir
Buttermilk is the secret behind the moist and tender crumb of a Red Velvet Cake. Its acidity reacts with baking soda, creating the perfect balance of flavors and textures.
3. All-Purpose Flour – The Foundation
Opt for a good-quality all-purpose flour to provide the structure for your cake. Sifting the flour ensures a lighter texture, preventing any unwanted lumps.
4. Unsalted Butter – Creamy Luxury
Butter adds richness and moisture to the cake. Choose unsalted butter to have better control over the overall salt content.
5. Eggs – Binding and Leavening
Fresh eggs act as both a binding agent and leavening agent, contributing to the cake’s structure and rise.
6. Red Food Coloring – A Splash of Drama
While the original red color came from a reaction between acidic ingredients and cocoa, today, red food coloring is the go-to option. Use a gel-based coloring for a vibrant, consistent hue.
7. Vanilla Extract – Flavor Harmony
Enhance the overall flavor profile with a good-quality vanilla extract. It complements the cocoa and adds a delightful aromatic touch.
8. Baking Powder and Baking Soda – The Lift
The combination of baking powder and baking soda ensures the cake rises to the occasion, creating a light and fluffy texture.
9. Salt – Elevating Flavors
A pinch of salt enhances the sweetness and balances the flavors. Opt for fine sea salt for even distribution.
10. Vinegar – Tangy Twist
A small amount of vinegar intensifies the tanginess, working in harmony with the buttermilk.
Ingredients for the Perfect Red Velvet Cake
Creating a Red Velvet masterpiece begins with selecting the finest ingredients. Each component plays a crucial role in achieving the cake’s signature flavor, texture, and visual appeal.
1. Cocoa Powder: The Heart of the Flavor
Choose high-quality cocoa powder to infuse the cake with a rich chocolate flavor. Opt for unsweetened cocoa for a perfect balance of sweetness.
2. Buttermilk: The Tangy Elixir
Buttermilk not only enhances the cake’s moistness but also contributes a subtle tanginess. If unavailable, you can create a buttermilk substitute by combining regular milk with a splash of vinegar or lemon juice.
3. All-Purpose Flour: The Foundation
Use reliable all-purpose flour for the cake base. Sift it for a lighter texture, ensuring a tender crumb in every bite.
4. Butter: Unsalted and at Room Temperature
Unsalted butter adds richness to the cake. Ensure it’s at room temperature for easy incorporation into the batter.
5. Sugar: White and Brown Harmony
A combination of white and brown sugar creates a perfect sweetness balance. Brown sugar adds moisture, enhancing the cake’s softness.
6. Eggs: Room Temperature
Eggs provide structure and stability to the cake. Allow them to reach room temperature before adding to the batter for optimal results.
7. Vanilla Extract: A Flavor Enhancer
Add a touch of vanilla extract to elevate the overall flavor profile. Choose pure vanilla for a more robust taste.
8. Red Food Coloring: Bringing the Drama
For that iconic red hue, use liquid or gel red food coloring. Adjust the quantity to achieve your desired intensity.
9. Baking Soda and Vinegar: The Leavening Magic
The combination of baking soda and vinegar reacts to leaven the cake, resulting in a light and fluffy texture.
10. Salt: Balancing Act
A pinch of salt enhances the overall flavor, ensuring the sweetness isn’t overpowering.
As we explore the art of crafting the perfect Red Velvet Cake, you might also find interest in understanding why it’s essential to discard sourdough starter to enhance your baking skills.
Step-by-Step Guide to Red Velvet Cake Perfection
1. Preparing Your Ingredients
Gather all your ingredients and ensure they are at the recommended temperatures. Having everything ready makes the baking process smooth and enjoyable.
2. Preheat Your Oven
Before diving into the mixing, preheat your oven to the specified temperature (usually around 350°F or 180°C). This ensures your Red Velvet Cake bakes evenly.
3. Sift and Mix Dry Ingredients
In a bowl, sift together the all-purpose flour and cocoa powder to remove lumps and aerate the mixture. Add a pinch of salt and set aside.
4. Creaming Butter and Sugar
In a separate large bowl, cream together the room temperature butter, white sugar, and brown sugar until light and fluffy. This step is crucial for a tender and moist cake.
5. Incorporating Eggs and Vanilla
Add the room temperature eggs one at a time, beating well after each addition. Mix in the vanilla extract for that extra layer of flavor.
6. Adding Buttermilk and Red Food Coloring
Alternate between adding the dry ingredients and buttermilk to the butter mixture, beginning and ending with the dry ingredients. Add the red food coloring gradually until you achieve the desired hue.
7. Baking Soda and Vinegar Reaction
In a small bowl, mix the baking soda with a splash of vinegar (white or apple cider vinegar). This reaction adds a lightness to the batter. Immediately fold it into the mixture.
8. Fill and Bake
Divide the batter evenly between prepared cake pans. Smooth the tops with a spatula and place them in the preheated oven. Bake until a toothpick inserted into the center comes out clean.
9. Let it Cool
Allow the cakes to cool in the pans for 10-15 minutes before transferring them to a wire rack to cool completely. This ensures the cakes set properly.
10. Cream Cheese Frosting
While the cakes cool, prepare the heavenly cream cheese frosting. Once the cakes are completely cooled, generously frost each layer.
Crafting the Ideal Cream Cheese Frosting
No Red Velvet Cake is complete without the heavenly touch of cream cheese frosting. This luscious topping not only enhances the cake’s flavor but also adds a velvety smoothness to every bite.
Ingredients for Cream Cheese Frosting:
- 8 oz (225g) cream cheese, softened
- 1/2 cup (115g) unsalted butter, softened
- 4 cups (480g) confectioners’ sugar
- 1 teaspoon vanilla extract
Instructions:
- Softening the Cream Cheese and Butter:
- Ensure the cream cheese and butter are at room temperature for effortless mixing. This step is crucial for achieving a silky-smooth consistency.
- Creaming the Cream Cheese and Butter:
- In a large bowl, beat together the softened cream cheese and butter until well combined. The mixture should be fluffy and free of lumps.
- Adding Confectioners’ Sugar:
- Gradually add the confectioners’ sugar, one cup at a time, while continuing to beat the mixture. This step ensures a smooth and sweet frosting.
- Incorporating Vanilla Extract:
- Add the vanilla extract to the mixture and beat until everything is well incorporated. The vanilla enhances the overall flavor of the frosting.
- Achieving the Perfect Consistency:
- If the frosting is too thin, add more confectioners’ sugar. If it’s too thick, a splash of milk can be added. Aim for a spreadable consistency that holds its shape.
- Frosting the Red Velvet Cake:
- Once your Red Velvet Cake layers are completely cooled, generously spread the cream cheese frosting between layers and over the entire cake. Use a spatula to create a smooth finish.
Pro Tips for Cream Cheese Frosting:
- Chilled Cake Layers: For easier frosting application, you can refrigerate the cake layers for about 30 minutes before applying the cream cheese frosting.
- Decorative Touch: Consider garnishing your frosted cake with a sprinkle of chopped nuts, chocolate shavings, or red velvet crumbs for an extra aesthetic appeal.
- For a unique twist on dessert ideas, consider pairing your Red Velvet Cake with a delightful dessert pizza. Explore the world of sweet toppings and create a culinary symphony for your taste buds.
Variations to Elevate Your Red Velvet Experience
1. Red Velvet Cupcakes
Transform the classic cake into bite-sized delights by preparing Red Velvet Cupcakes. Perfect for individual servings at parties or gatherings.
2. Cream Cheese Filling
Add a layer of cream cheese filling between the cake layers for an extra burst of creamy goodness. It’s a surprise element that elevates the overall experience.
3. Red Velvet Cheesecake Swirl
Combine the best of both worlds by incorporating a swirl of cheesecake batter into your Red Velvet Cake. The contrasting textures and flavors will leave your guests in awe.
4. Raspberry or Strawberry Filling
Introduce a fruity element by layering your cake with fresh raspberry or strawberry filling. The tartness complements the sweetness of the cake.
5. Red Velvet Whoopie Pies
Create handheld treats by making Red Velvet Whoopie Pies. Sandwich cream cheese frosting between two cake-like cookies for a fun and portable dessert.
6. Red Velvet Roll Cake
Roll up the goodness with a Red Velvet Roll Cake. A thin layer of Red Velvet Cake rolled with cream cheese frosting creates a stunning spiral when sliced.
7. Chocolate Ganache Drizzle
Enhance the chocolate flavor by drizzling a decadent chocolate ganache over the cream cheese frosting. It adds a glossy finish and an extra layer of indulgence.
8. Red Velvet Cake Pops
Transform your Red Velvet Cake into bite-sized pops by shaping the cake into balls, placing them on sticks, and coating them in a colorful chocolate shell.
9. Marbled Red Velvet Brownies
Combine the elegance of Red Velvet with the fudgy goodness of brownies. Create a marbled effect by swirling red velvet batter into your brownie mix.
10. Red Velvet Trifle
Layer crumbled Red Velvet Cake with whipped cream and fresh berries in a trifle dish for a visually stunning and delicious dessert.
Troubleshooting and Expert Tips
1. Cake Too Dense or Dry:
- Expert Tip: Ensure accurate measurements and avoid overmixing the batter. Incorporate the dry ingredients gradually to maintain the cake’s light texture.
2. Cake Doesn’t Rise:
- Expert Tip: Check the freshness of your baking soda and ensure the vinegar reaction is immediate. Also, make sure your oven is preheated to the correct temperature.
3. Uneven Coloring:
- Expert Tip: Achieve a uniform red hue by using quality food coloring and distributing it evenly throughout the batter. Consider gel coloring for a more vibrant result.
4. Cream Cheese Frosting Too Runny:
- Expert Tip: Soften butter and cream cheese to room temperature, and gradually add confectioners’ sugar. Adjust consistency with additional sugar or a touch of milk as needed.
5. Overmixing Batter:
- Expert Tip: Mix until just combined to avoid a dense texture. Overmixing can lead to a tough cake.
6. Storing the Cake:
- Expert Tip: Store Red Velvet Cake in an airtight container in the refrigerator. Bring it to room temperature before serving for the best taste and texture.
7. Choosing Quality Ingredients:
- Expert Tip: Invest in high-quality cocoa powder, food coloring, and fresh ingredients for an authentic Red Velvet experience.
8. Room Temperature Ingredients:
- Expert Tip: Allow butter, eggs, and buttermilk to come to room temperature before starting. This ensures proper incorporation and a smoother batter.
9. Testing Doneness:
- Expert Tip: Use a toothpick or cake tester to check for doneness. It should come out clean or with a few moist crumbs attached.
10. Preparing Pans:
- Expert Tip: Grease and flour your cake pans or use parchment paper to prevent sticking and ensure easy release.
Troubleshooting and Expert Tips
1. Cracking or Sinking in the Center:
- Issue: Overmixing the batter.
- Tip: Gently fold in the dry ingredients until just combined. Overmixing can result in a less-than-perfect rise.
2. Dry or Dense Cake:
- Issue: Too much flour or overbaking.
- Tip: Measure flour precisely and avoid overbaking. Use a toothpick to check for doneness; it should come out with a few moist crumbs.
3. Flat or Tough Texture:
- Issue: Insufficient leavening agent.
- Tip: Ensure your baking soda is fresh and active. The reaction with vinegar is crucial for a light and fluffy texture.
4. Uneven Coloring:
- Issue: Inconsistent mixing of food coloring.
- Tip: Mix the food coloring evenly into the batter to achieve a consistent and vibrant red hue.
5. Cream Cheese Frosting Too Runny or Stiff:
- Issue: Incorrect ratio of ingredients.
- Tip: Gradually add confectioners’ sugar to achieve the desired consistency. Adjust with milk or more sugar as needed.
6. Storing Red Velvet Cake:
- Tip: Store the cake in an airtight container in the refrigerator. Bring it to room temperature before serving for the best flavor and texture.
7. Enhancing Flavor:
- Tip: Experiment with a hint of espresso in the batter to intensify the chocolate flavor without overpowering the cake.
8. Baking Strips for Even Layers:
- Tip: Consider using baking strips around the cake pans to promote even baking and prevent doming.
9. Fresh Ingredients Matter:
- Tip: Use fresh ingredients, especially baking soda and powder, for optimal rise and flavor.
Pairing and Serving Suggestions
1. Beverage Pairings:
- Coffee: The rich, robust flavor of coffee complements the sweet and slightly tangy notes of Red Velvet Cake.
- Milk: A classic choice, milk’s creamy texture balances the cake’s richness.
- Red Wine: For an elegant touch, pair with a red wine like a Merlot or Cabernet Sauvignon.
2. Garnishes:
- Fresh Berries: Top your cake with a medley of fresh berries like strawberries, raspberries, or blueberries for a burst of color and freshness.
- Chocolate Shavings: Create curls or shavings from a chocolate bar to add a touch of elegance.
- Edible Flowers: For a whimsical presentation, consider edible flowers like pansies or violets.
3. Presentation Ideas:
- Layered Elegance: Stack your Red Velvet layers high for a visually impressive cake. The contrast of red cake and white frosting is a feast for the eyes.
- Cupcake Extravaganza: If making cupcakes, arrange them in a tiered display for a delightful centerpiece at gatherings.
- Individual Servings: Serve slices on decorative plates with a dollop of whipped cream or a scoop of vanilla ice cream for a personalized touch.
4. Special Occasion Themes:
- Valentine’s Day: Shape your cake into a heart, or use heart-shaped decorations, to create a romantic dessert.
- Holiday Decor:* Decorate with festive colors or add edible gold or silver for a holiday celebration.
5. Serving Sizes:
- Small Gatherings: For intimate gatherings, opt for cupcakes or a single-layer cake.
- Celebrations: For larger events, a multi-layered cake serves as a showstopper.
6. Storage and Freshness:
- Refrigeration: Store the cake in the refrigerator to maintain freshness, especially if it has a cream cheese frosting.
- Covering: Use plastic wrap or an airtight container to prevent the cake from drying out.
Frequently Asked Questions (FAQs) about Red Velvet Cake
1. Why is it called Red Velvet Cake?
- Answer: The cake gets its name from its velvety texture, and the deep red color is achieved with the help of food coloring. Originally, the red hue was a result of a chemical reaction between cocoa and acidic ingredients.
2. Can I make Red Velvet Cake without food coloring?
- Answer: Yes, you can. Natural alternatives like beet juice or pomegranate juice can be used to achieve a red hue. However, the color may not be as vibrant as with traditional food coloring.
3. What type of cocoa powder is best for Red Velvet Cake?
- Answer: Use high-quality unsweetened cocoa powder for the best flavor. Dutch-processed cocoa powder is a popular choice, but natural cocoa powder works well too.
4. How can I prevent my Red Velvet Cake from being too dense?
- Answer: Ensure you measure your flour correctly, avoid overmixing the batter, and use fresh leavening agents (baking soda and vinegar) for optimal rise.
5. Can I freeze Red Velvet Cake?
- Answer: Yes, you can. Wrap the cake layers securely in plastic wrap and freeze for up to three months. Thaw in the refrigerator before serving.
6. Can I make Red Velvet Cupcakes using the same recipe?
- Answer: Absolutely! Simply portion the batter into cupcake liners and adjust the baking time accordingly. Cupcakes are a delightful and portable option.
7. How do I store a cake with cream cheese frosting?
- Answer: Store the cake in an airtight container in the refrigerator. Bring it to room temperature before serving for the best taste and texture.
8. What makes the cream cheese frosting tangy?
- Answer: Cream cheese itself has a slight tanginess. You can enhance it by adding a splash of lemon juice to the frosting for a brighter flavor.
9. Can I make Red Velvet Cake ahead of time?
- Answer: Yes, you can bake the cake layers in advance and freeze them. Frost the cake when you’re ready to serve for the freshest taste.
Conclusion
Embarking on the journey of crafting the perfect Red Velvet Cake is not just a culinary endeavor; it’s a celebration of flavors, creativity, and the joy that a delightful dessert brings to special moments. From the rich history and vibrant hues to the meticulous steps of preparation, each element plays a crucial role in making this classic treat a masterpiece.
As we’ve navigated through the intricacies of Red Velvet Cake creation, from selecting the finest ingredients to troubleshooting common issues and exploring innovative variations, I trust you’ve gained valuable insights and inspiration for your baking adventures.
Remember, the beauty of Red Velvet Cake lies not only in its velvety texture and striking appearance but also in its adaptability. Whether you’re crafting cupcakes for a joyful gathering or a multi-tiered masterpiece for a momentous celebration, the possibilities are as endless as your imagination.
Personalizing the Red Velvet experience for special occasions adds that extra layer of sentiment, turning each slice into a cherished memory. So, embrace the artistry of baking, experiment with flavors, and revel in the joy of sharing your Red Velvet creations with loved ones.
May your Red Velvet Cake endeavors be filled with sweetness, success, and the pure pleasure of creating something truly extraordinary. Happy baking, and may your kitchen always be filled with the aroma of delicious delights!